Some of you commented that the photos looked fine s-o-o-c. And I agree. But fine is not perfect, and I like perfect. And if there's something about a particular photo that would bug the crap out of me if it were hanging on my wall, I'm going to fix it.
So let's look at this one of Smooch first:
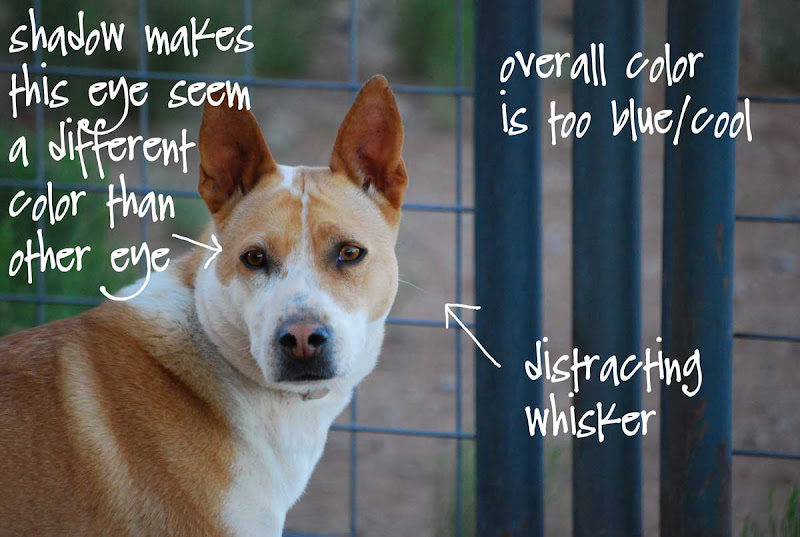
Here is the fixed version:
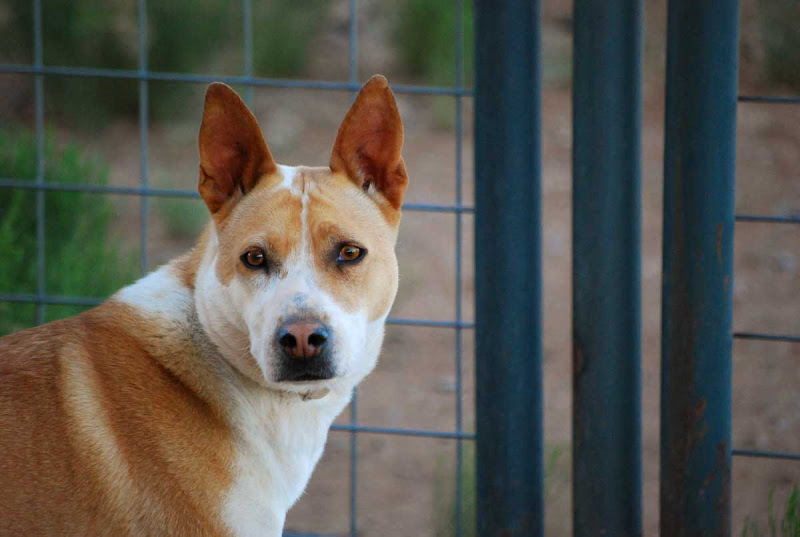 Now that's better. The colors in the Photoshopped version more closely resemble what Smooch looked like when I took the picture, and that pesky whisker won't haunt me in my dreams.
For the Photoshop nerds amongst us, here is what I did:
1. removed distracting whisker using the clone tool
2. lightened the iris of Smooch's eye using MCP's free Touch of Lightness/Touch of Darkness action
3. warmed up the overall color using PW's free Warmer action
4. applied Auto Contrast - most digital photos have what I can only describe as a "dull film" over them when they're s-o-o-c. There are a pile of ways to get rid of it in Photoshop - my favorites are Auto Contrast or PW's Boost action applied at a very low percentage.
This photo of Hank needs some help before I would ever hang it on one of my walls.
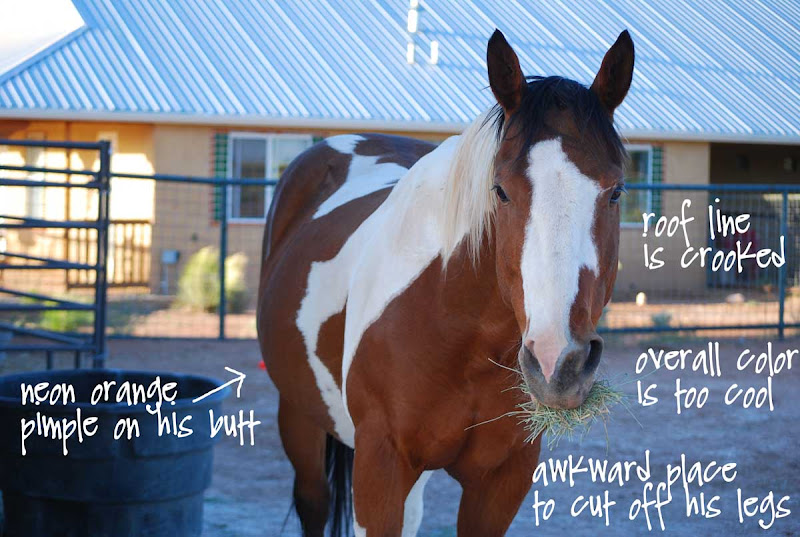
Unintentionally crooked lines, like the roof in the s-o-o-c version, make me freakin' nuts. If I did nothing else to Hank's photo, I would have to straighten it. And remove the bit of traffic cone behind him that looks like a neon orange pimple.
Here is the fixed version:
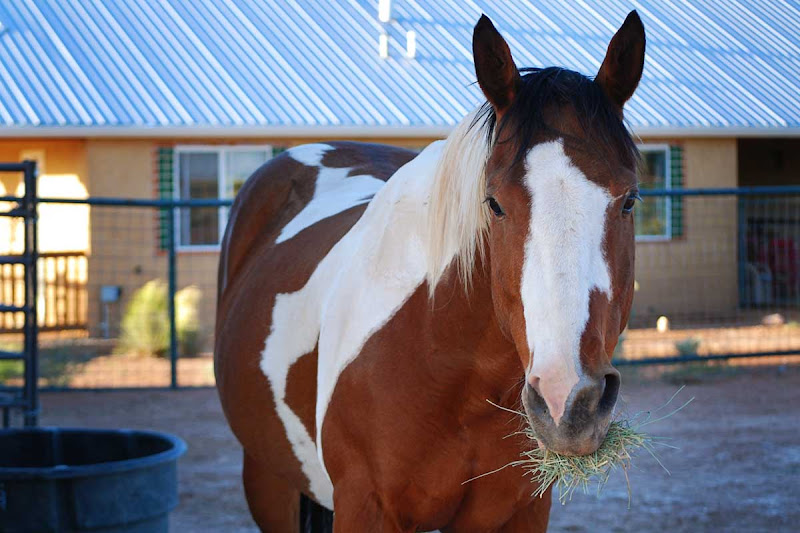 I will sleep much better tonight knowing that my roof is not crooked. Whew. Here is what I did:
1. Straightened the image using Photoshop's ruler tool, then arbitrary rotate function.
2. Cropped the image so that is was more of an equine waist-up shot.
3. Removed the bit of traffic cone with the clone tool.
4. Applied PW's Warmer action at 47%
5. Applied PW's Boost action at 34%
6. Darkened the left and right edges of the image with MCP's Touch of Lightness/Darkness action so that Hank would stand out better against the background.
Let's stop right here to give a gigantic shout-out to Pioneer Woman and Jodi at MCP for sharing free downloadable actions with the rest of us photo geeks. Actions are an automated series of steps in Photoshop – press one button and voila! You've got yourself a better picture and saved yourself a heckuva lot of time. Not all actions are created equal, but the ones these ladies offer are magnificent.
Now it's Alan's turn:
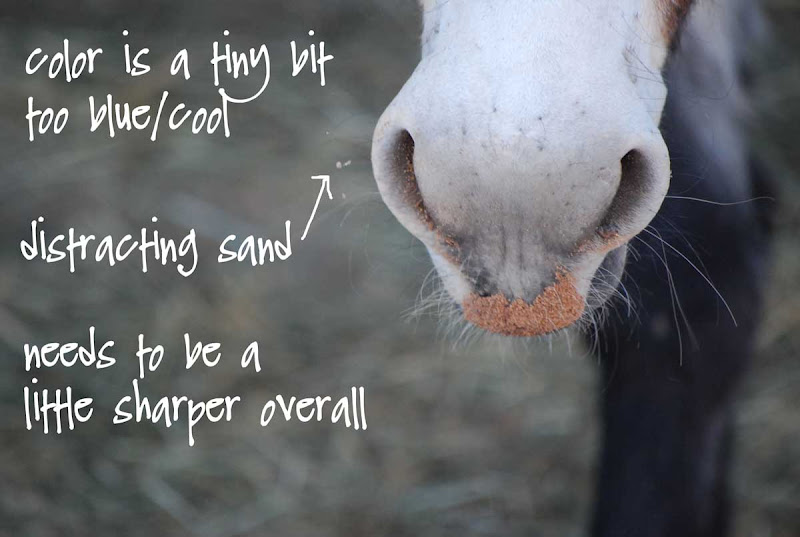
I wavered about removing the distracting bits of sand on Alan's whiskers, so I asked myself, "what is this photo about?" I answered, "the reddish sand on Alan's exquisite muzzle." I talk to myself alot. Those tiny bits of white sand drew my eye away from his exquisite muzzle, so away they went. Have I ever told you I'm a perfectionist? It's a chronic disease and there is no cure.
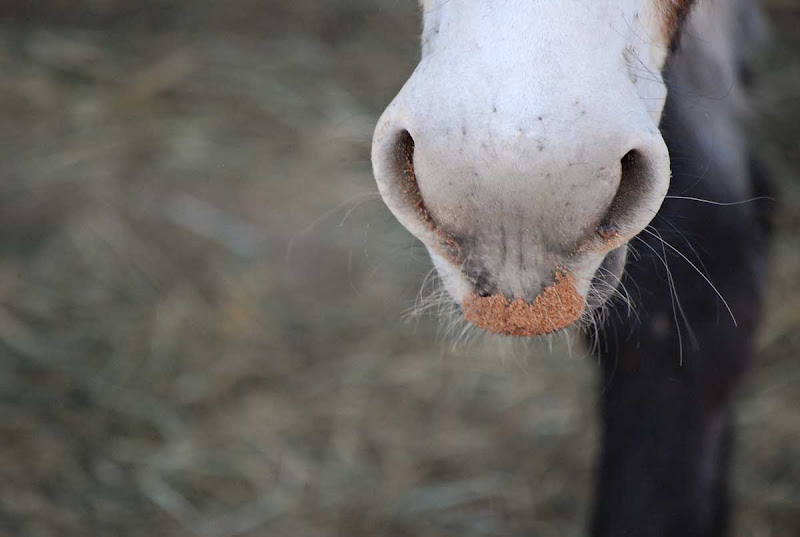 Here's what I did:
1. Removed the distracting grains of sand with Photoshop's spot healing brush and clone tool.
2. Applied PW's Warmer action at 38%
3. Applied MCP's High Definition Sharpening action at 75%
Ok, purists, this one's for you. Here is the straight-out-of-the-camera version of George:
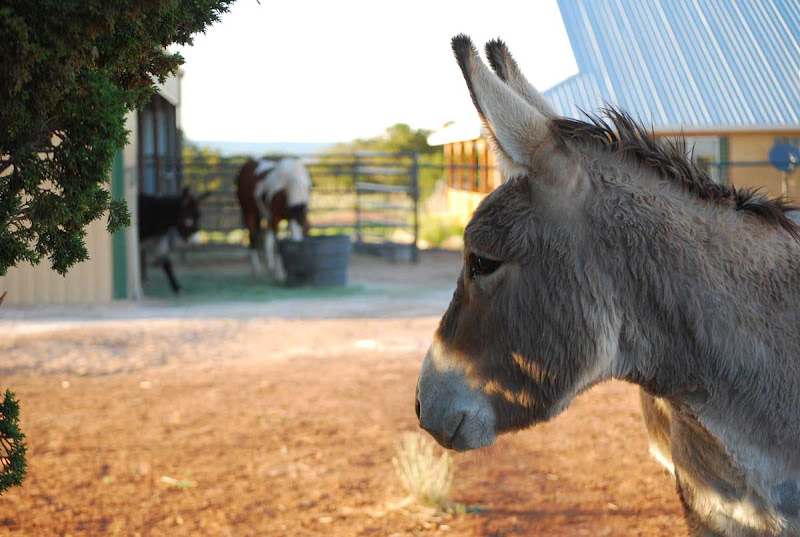 It is also the final version of George. I'm not going to do one darned thing to it because I think it's perfect just the way it is.
Now what can possibly be wrong with this much adorableness?
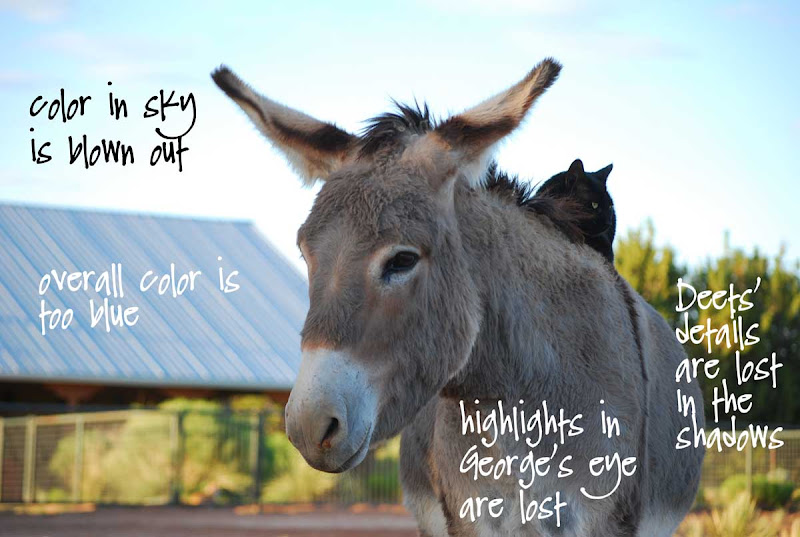
The exposure on this shot was tricky because George and Alan are standing in the shade and the background is brightly lit by the sun. When you take candid pictures of animals, it's not like you can say, "could you guys please move over here where the light is better?" You've got to take what you can get and make the best of it.
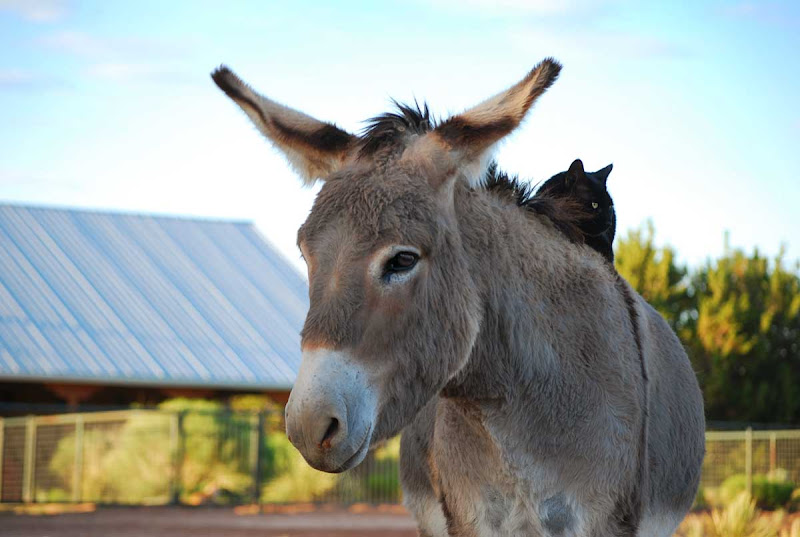 Here's what I did:
1. Applied PW's Warmer action at 28%
2. Used MCP's Touch of Lightness action on George's and Deets' eyes and Deets' fur to bring out the highlights.
3. Used PW's Sharpen This action on George's and Deets' eyes.
4. Used MCP's Touch of Darkness action on the sky
5. Applied PW's Boost action at 22%.
I like to use Photoshop to make good photographs better - rarely will it make a bad photograph good. But sometimes when a bad photograph is all I've got, it's fun to try to salvage it with Photoshop. I'll show you some examples of that tomorrow.

Now all that is amazing. I never thought there could be such differences! I'm just a point and shoot gal, going in spells with my little digital camera, but you've sparked an interest in me now. I'm anxious for tomorrow lesson now. Thanks Carson!
ReplyDeleteWell, I wasn't going to say anything, but that distracting whisker in the photo of Smooch was making me crazy ! Thanks for fixing it ;)
ReplyDeleteAs soon as you pointed out some of the things you didn't like, I had to agree 100%. Crooked roof lines drive me batshit. Blown out images make me crazy. I still haven't made the jump to PS because I don't think I have the focus to actually read how to use it. What you did with the eyes is one thing I can't figure out using any other software and I hate when the eyes don't pop in my pictures. Looking forward to seeing what you post tomorrow.
ReplyDeleteThanks for a very interesting post. (Feel free to do more of them in the future!)
ReplyDeleteWhat version of photoshop do you use?
This is great stuff. Keep it coming.
ReplyDeleteVery informative post. Your pictures are always a step above the rest. Thanks for sharing. Can't wait for tomorrow's tricks.
ReplyDeleteSuper cool Carson! Thanks! One of these days I'll have Photoshop... Can't wait for tomorrow's post... I mean, seriously? You can take a bad picture? Non!
ReplyDeleteWow, thanks so much! How do you get anything else done with all those photo ops at your ranch? Wait until your hens get bigger....chickens are such a great colorful subject for photos.
ReplyDeleteBtw, what's with the pimple anyway? LOL!
ReplyDeleteExcellent tutorial, Linda. It's because of people like you that I've learned so much about working on my photos. My sooc shots are usually pretty poor looking, but with a little photoshop magic they come to life!
ReplyDeleteI'll definitely check out the links you listed. I have a favorite texture I use now on almost all my photos just to warm them up a bit. Like you, blues tend to dominate my images. Unsharpen Mask is tool I use on all my images also. And like you, crooked roofs, water, etc., bother me. It's the first thing I notice when I look at someone else's photos. Luckily I think most others never see it.
You and my husband are part of the same photographic tribe! :)
ReplyDeleteI am from the tribe that says edit the best you can through the lens, and live with what you end up with. (another word for this is probably laziness!)
Husband keeps trying to give me Photoshop. I keep saying no.
When I want perfection, I go to his website and here! :)
Ohhhh, my eye is so not artistic! However, I must admit that once you showed the corrections I could really see the difference and see your reasoning.
ReplyDeleteThanks for sharing and I too, would love to have more tips on occasion!
This was a great, short, powerful lesson. Thanks for taking the time to put it together.
ReplyDeleteJust wondering, does your camera do a good job of reproducing the colour Purple ? Mine ALWAYS turns Purple subjects Blue, doesn't matter what the light conditions my Purples (mostly flowers ... Iris, Clematis etc) always come out Blue. My Blue skys are fine, though nothing like as dramatic as yours in NM, but accurate. Any idea what's wrong with my Purples ?
ReplyDeleteI only know a wee teensy bit about how to use Photoshop. So, I use it a wee teensy bit. I just don't devote enough time to learning it or using it. I need lots of time to get my mind around some of this stuff.
ReplyDeleteLately, I seem to have a deficit of time. I don't know what it is. Perhaps I'm stuck in a time warp of some kind...
Automated tools in photoshop? Be still my heart - thanks, I'm grabbing some!
ReplyDeleteThank you oh might one...ya know about 6 months ago we ordered Photoshop (the basic one on sale for $60 or so?) and I haven't taken the time to start on it. NOW I need to cuz of what you've shown me today. And --- I think it's so cool how PSing everything got rid of those pesky scribbles in white pen all over your lovely pics!
ReplyDeleteWow what a difference that makes, I may have to try editing some of mine now.
ReplyDeleteI am so excited about this post and am saving it to refer back to. I use Photoshop Elements 8 and Pioneer Woman has actions for it which I downloaded. But I have been wanting someone to walk me through what changes they did. I appreciate this.
ReplyDeleteThanks for the photo lessons. It doesn't sound really too hard after all.
ReplyDeleteBest always, Sandra
Have to agree with Dreaming.....don't know what needs to be fixed in a pic but know what's good when I see it. Amazing, you are. Your raw pics are great! And don't need any work in my opinion but your after shots definitely rival any that hang in the finest galleries around!
ReplyDeleteI am passing link to my sister who likes to use photoshop. She'll really appreciate.
Awesome tutorial. Makes me want Photoshop! When I first saw the picture of George with Deets on his back, I thought how you always capture such great eyes in your pics. Now I see how a little editing makes for such a great pic!
ReplyDeleteThis is great. I am hungry for this practical information. Don't have Photoshop but understand what you are talking about regarding warmth and distraction and detail.
ReplyDeleteYour analysis of the photos needing fixing are educational--but the same holds true of the photos you do NOT tinker with. Tell us why the "final version of George is perfect the way it is." What are your parameters for a good photo overall?
Very Good Pics...someday I may be able to get Photoshop, in the meantime I will have to settle for real life pics, I own not only the burro, but the cat as well...you are a lucky person.
ReplyDelete